Audit Ready Pre Start Checklist for Machinery Operators & Supervisors
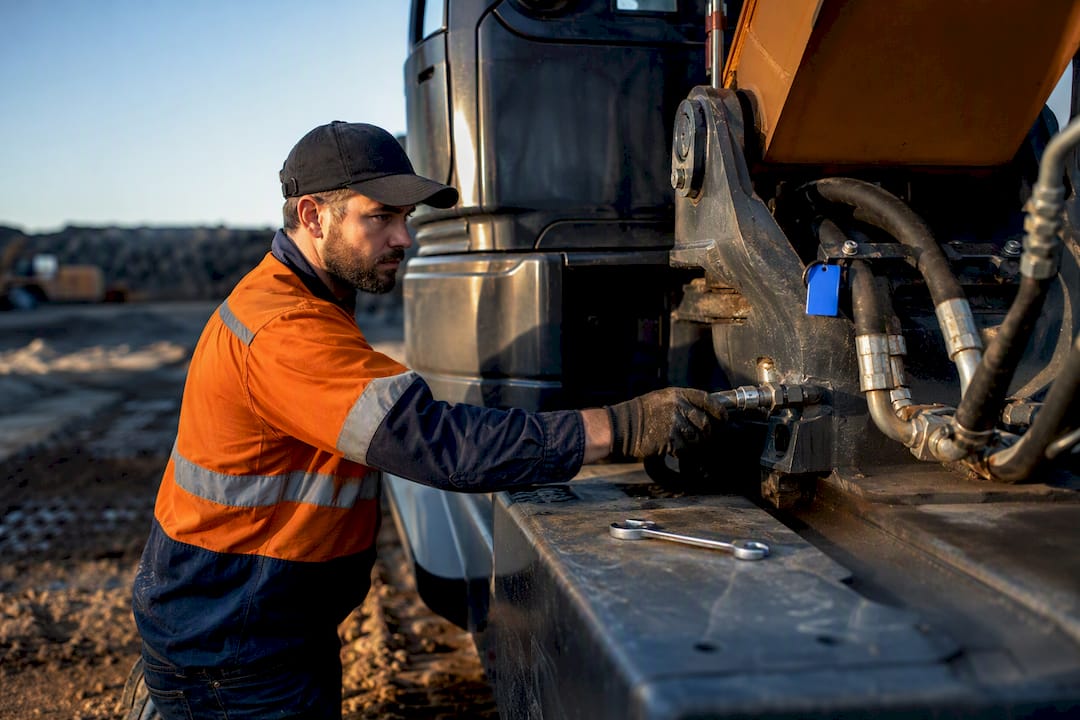
A machinery pre-start checklist is the daily walk-round an operator completes before starting any plant, confirming the machine is safe to run. Check fluids, brakes, lights and alarms, guards, and tyres or tracks first, then verify the operator holds the right licence or competency for that machine. Record every result, and tag out anything that fails before it turns into a bigger problem on site.
TL;DR:
- The most common faults include fluid leaks, worn tires or damaged tracks, loose guards, and warning lights, which require immediate tagging out and repair.
- Operators must conduct checks every time a machine is used, especially after refueling or servicing, with records including machine ID, operator name, date, faults, and corrective actions.
- Faults such as brake issues, malfunctioning alarms, or damaged safety devices must be tagged out immediately, with repair verified by a qualified person before reuse.
- Digital pre-start systems improve compliance tracking, fault documentation, and repair workflows, reducing paperwork and increasing real-time visibility.
- Full mechanical inspections by qualified technicians at regular intervals complement daily checks by identifying internal wear and structural issues that daily walk-arounds cannot detect.
Table of Contents
- Building a full pre start safety checklist for the walk-round
- Who’s responsible for completing and recording a pre start check?
- What are the most common faults found in pre start checks?
- Choosing between paper templates, form builders and field apps
- Verifying emergency stops and fire suppression before you start
- Checking site and environmental conditions before starting up
- What to do the moment a pre start check finds a fault
- How often should machinery get a full inspection, not just a pre start?
- Author perspective: making pre starts habitual on busy sites
- A digital option for pre-starts that don’t get skipped
- Practical checklists and templates to download or follow
- Sources
Building a full pre start safety checklist for the walk-round
A proper walk-round follows the machine from the ground up, not a random glance at whatever’s easiest to see. Structure it by system so most operators can complete a typical excavator, loader or truck walk-round efficiently.
Start with fluids and leaks. Check engine oil level against the dipstick markers, coolant level in the reservoir (never the radiator cap when hot), hydraulic fluid level and condition, and fuel level. Look under the machine for fresh drips or staining on hoses, fittings and the ground beneath the engine bay. A slow hydraulic leak often shows up first as a damp patch on a fitting rather than a puddle, so run your eye along every visible hose join.
Next, tyres, tracks and undercarriage. On wheeled plant, check tread depth, sidewall damage, and correct inflation by eye or gauge. On tracked machines, check track tension, look for missing or cracked track pads, and inspect idlers and rollers for oil seepage, which usually signals a failing seal.
Controls and safety devices come next, and this is where most defects hide until someone actually tests them:
- Brakes — test park brake holds on a slight grade; service brake should feel firm, not spongy.
- Steering — check for excessive play before the wheels respond.
- Horn and reversing alarm — sound both; a weak or silent alarm is a tag-out item on its own.
- Lights — headlights, tail lights, indicators and beacon all functioning.
- Seatbelt — buckle engages and retracts cleanly, webbing isn’t frayed.
- ROPS/FOPS structure — no visible cracks, bent posts or missing bolts.
Cab checks matter as much as anything under the bonnet. Confirm mirrors are adjusted and unbroken, gauges and warning lamps are legible, windows are clean enough for genuine visibility, and the horn is within reach. Guards, covers and attachment pins need a hands-on check, not a glance. Push on belt guards to confirm they’re bolted, not just resting in place, and check that bucket pins, quick hitches and coupling points are secured with their retaining devices fitted, not just the pin pushed through.
Round out the walk-round with the fire extinguisher (charged, in-date, mounted securely), required signage, and all work lights if the machine runs in low-light conditions. This mix of checks lines up with the fire extinguisher, lighting and fluid-leak items that pre-operational checks for tractors also flag as essential before use.
Once the engine’s running, the checklist isn’t finished. Watch idle for roughness, check no warning lamps stay illuminated after start-up, and cycle hydraulic controls through their full range with no unusual noise or delay.
On the form itself, keep the language blunt: write “OK” for a pass, “Fault, tag out” the moment something fails, and “Repaired” only once a qualified person has actually fixed it and re-checked the item.
Pro Tip: Put the highest-risk items, brakes, steering and safety devices, at the top of the form, not the bottom. If an operator only gets through half the checklist before getting interrupted, you want the critical stuff covered first.
Who’s responsible for completing and recording a pre start check?
The operator who’s about to use the machine does the check, every time, not whoever happened to use it last. Supervisors verify compliance through spot-checks and by reviewing submitted records, not by assuming the paperwork got done.
Timing matters more than most sites treat it. A pre start isn’t a once-a-day box tick if the machine changes hands, moves to a new site, or gets refuelled or serviced mid-shift. Any of those events should trigger a fresh check.
A record only has value if it captures the right fields. At minimum, that means:
- Machine ID or asset number
- Operator name
- Date and time of the check
- Pass or fail result for each item
- Photos of any fault found
- Corrective action taken and who signed it off
That list mirrors what standardised equipment startup checklist forms recommend for accountability and trend analysis over time. Paper forms still work for small fleets, provided they use indelible ink, capture every required field, and get filed somewhere retrievable for an audit. Digital pre-start apps go a step further: mandatory fields stop an operator submitting an incomplete form, timestamps remove any ambiguity about when a check happened, and photo evidence turns a vague “hydraulic leak noted” into something a mechanic can act on immediately. A typical digital workflow runs fault found, photo attached, work order raised, mechanic notified, repair logged, re-check signed off, all inside one record instead of scattered across a logbook and a phone call.
What are the most common faults found in pre start checks?
Fluid leaks, worn tyres or damaged tracks, loose or missing guards, and dashboard warning lights top the list of recurring faults on most sites. None of them are surprising. What separates a well-run site from a risky one is how fast the fault gets acted on.
The pass/fail line has to be firm. If a safety device fails, brakes feel soft, an alarm won’t sound, a guard isn’t secured, the machine gets tagged out immediately. No “we’ll fix it after this job.” The escalation path should be short enough that nobody’s confused about what to do next:
- Operator finds the fault and tags the machine out.
- Supervisor is notified and confirms the machine is taken out of service.
- Maintenance assesses, repairs, and signs off the corrective action.
- Machine returns to service only after a documented re-check.
Two quick examples show how this plays out. A loader operator notices the reversing alarm isn’t sounding during the walk-round. They tag it out, note “Fault, tag out, alarm” on the form, and the machine sits idle until an electrician replaces the sensor and re-tests it before sign-off. Separately, a dozer’s undercarriage inspection turns up a cracked idler seal leaking oil. Rather than topping up and hoping, the operator logs it with a photo, maintenance schedules the repair for that afternoon, and the machine is back on the roster the same day with a clean re-check entry.
Pro Tip: Never let “it’s a minor leak” talk you out of a tag-out. Small leaks on hydraulic components rarely stay small, and a $200 seal today beats a $20,000 hydraulic failure next week.
Choosing between paper templates, form builders and field apps
A printable template is genuinely enough for a single machine or a small crew, provided it’s structured by system (fluids, controls, tyres, safety devices) and stored where it can be found again later. A printable plant pre-start checklist covering these sections is a reasonable starting point for sites without existing digital tools.
Form builders are a sensible middle step: they digitise the same layout into a fillable PDF, cutting some paperwork without demanding new hardware or training.
A field app or integrated platform earns its cost once you’re running multiple machines across more than one site, need a defensible audit trail, or want photo evidence attached to every fault automatically. Before deciding, weigh:
- How many machines and sites need coverage
- Whether crews have reliable connectivity on-site
- Operator comfort with a phone or tablet versus paper
- Whether the tool needs to integrate with dockets or maintenance records
Run a two-week pilot on one crew before rolling out anything site-wide. Track completion rates and time spent per check, then compare against your current paper process.
Verifying emergency stops and fire suppression before you start
Testing the emergency stop is not optional, and it’s not the same as checking it exists. Press every e-stop button on the machine, confirm the engine cuts and hydraulic movement halts immediately, then reset and confirm normal operation resumes. If an e-stop is sluggish, doesn’t fully cut power, or fails to reset cleanly, the machine doesn’t leave the yard.
On plant fitted with automatic fire suppression, whether that’s an engine bay system on an excavator or a cab-mounted system on underground equipment, the pre-start needs to confirm the system shows an active, in-date status on its gauge or indicator light, and that the manual pull or activation point is unobstructed and clearly signed. A suppression system with a discharged cylinder or an expired service tag is functionally the same as having no protection at all, and it should be treated as a tag-out item, not a note for later.
Handheld extinguishers deserve the same scrutiny every time, not just an annual glance. Confirm the pressure gauge sits in the green zone, the pin and tamper seal are intact, and the extinguisher is mounted where it’s meant to be rather than rattling around in a footwell. This lines up with the same fire extinguisher condition checks flagged in pre-operational checks for tractors, and it applies just as much to a grader as it does to a tractor.
Write both checks into the form as separate line items, not folded into a general “safety devices, OK” tick. An e-stop failure and a discharged extinguisher are two different faults with two different fixes, and a vague pass/fail line makes it harder for maintenance to know what they’re actually walking into.
Checking site and environmental conditions before starting up
A machine can pass every mechanical check and still be unsafe to start if the ground underneath it or the air around it hasn’t been assessed. Before firing up any plant, walk the immediate area and look for overhead hazards: power lines, low structures, or overhanging branches that weren’t there yesterday.
Ground conditions change fast on an active site. Check for recent excavation nearby, soft or waterlogged ground that could affect stability, and any underground services marked or unmarked in the work zone. A stable-looking surface after overnight rain can hide a completely different load-bearing capacity than it had the day before.
Visibility and weather deserve a real assessment, not a glance out the cab window. Fog, dust, or low sun angle can cut effective visibility well below what’s safe for the machine’s blind spots, and high wind affects anything with a raised boom, mast or bucket. If visibility or wind conditions fall outside what the machine’s rated for, the start gets delayed, not pushed through because the schedule’s tight.
Check for other personnel and plant working in proximity, confirm exclusion zones are marked, and verify nobody’s inside the machine’s swing radius or travel path before the engine turns over. On sites running multiple machines close together, this single check prevents more incidents than almost any mechanical item on the form.
Finally, note any atmospheric or environmental hazard specific to the task: dust levels in enclosed excavation, fumes in confined spaces, or extreme heat that affects both the operator and the machine’s cooling systems. None of this replaces a full site risk assessment, but a pre start that ignores the ground and air around the machine is only doing half the job.
What to do the moment a pre start check finds a fault
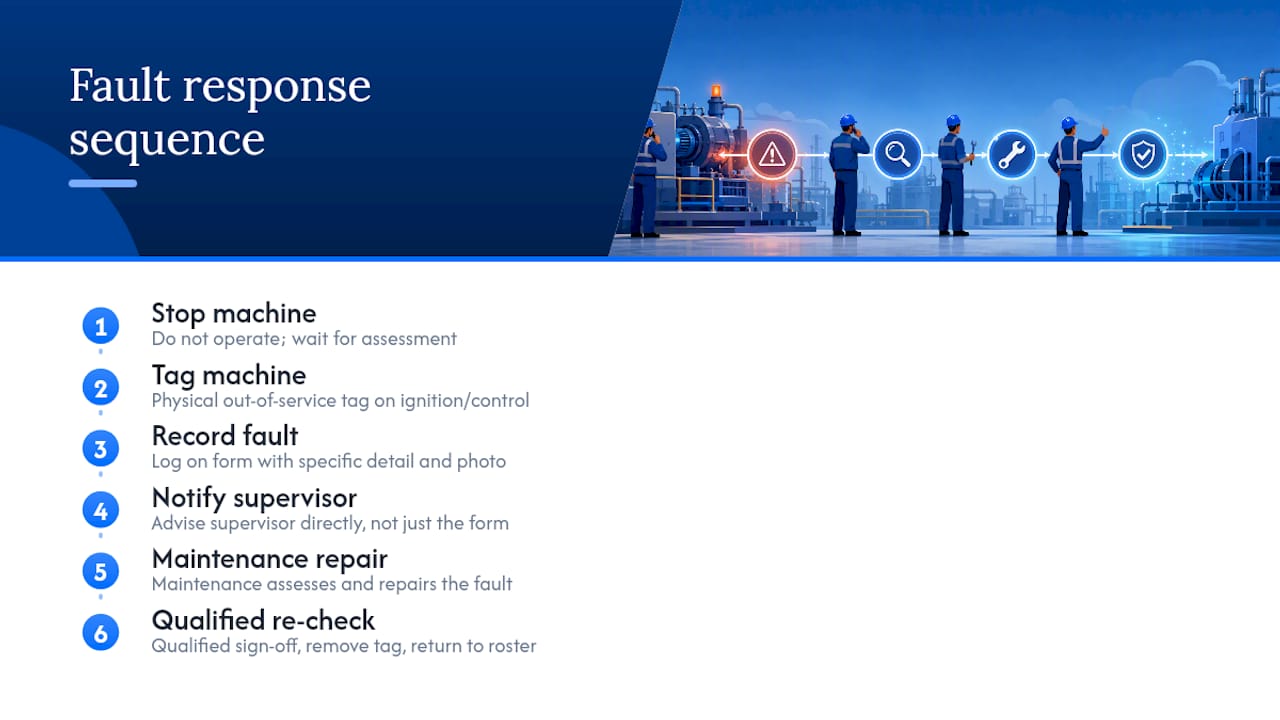
Stop before you start. That’s the entire first step. Once an operator identifies a fault, whether it’s a soft brake pedal, a cracked hydraulic hose or a warning lamp that won’t clear, the machine does not move under its own power until the fault is assessed.
Tag the machine immediately using a physical out-of-service tag on the ignition or control point, not just a note on the form. A tag stops the next person walking past from assuming the machine’s fine and jumping in. Record the fault on the pre start form with as much specific detail as possible, ideally with a photo, because “hydraulic issue” tells a mechanic nothing useful while “oil weeping from the boom cylinder rod seal” tells them exactly where to look.
Notify the supervisor directly rather than leaving it in a form they might not check until end of shift. On a lot of sites, a defect that stops a machine also stops a work sequence downstream, so early notice matters for scheduling as much as for safety.
From there, the fault goes to maintenance for assessment and repair, and the record stays open until someone qualified signs off a re-check confirming the fault’s actually fixed, not just that a mechanic looked at it. Only after that sign-off does the tag come off and the machine return to the roster. Skipping the re-check step is one of the most common ways a “temporary” fix turns into a repeat failure a few weeks later.
How often should machinery get a full inspection, not just a pre start?
A daily pre start catches the obvious stuff, but it’s not a substitute for a periodic comprehensive inspection carried out by a qualified technician. Most manufacturers set service intervals around engine hours, typically every 250 or 500 hours depending on the machine, and these cover items no walk-round can properly assess: internal wear, fluid analysis, structural inspection of the ROPS/FOPS mounting points, and calibration of safety systems like automatic shutdowns.
Weekly or monthly checks sit between the two. A supervisor-led weekly review might dig deeper into undercarriage wear patterns, hydraulic hose condition under load, or brake lining thickness, things a five-minute daily walk-round isn’t designed to catch. Statutory inspections add another layer again. Cranes, lifting attachments and some mobile plant carry mandatory periodic inspection requirements under workplace safety regulations, and those need a competent person’s sign-off, not an operator’s daily tick.
The daily pre start is your early-warning system. The scheduled service is what actually keeps the machine mechanically sound over its working life. Treat the two as complementary layers rather than a hierarchy where one replaces the other, and log both in the same record system so a pattern of recurring minor faults on the daily checks can actually trigger an early service call instead of waiting for the fault to become serious.
Author perspective: making pre starts habitual on busy sites
Short forms get finished. Long ones get skipped. Use the same machine IDs and operator names every time, add supervisor spot-checks, and completion rates climb without anyone needing a lecture about safety culture.
— Mike
A digital option for pre-starts that don’t get skipped
A digital pre-start system gives supervisors what a paper logbook never can: a live, audit-ready record of every pre-start across the fleet, without chasing drivers for the docket at the end of the week. Operators complete digital checklists on their phone, attach a photo the moment they spot a fault, and the corrective-action workflow routes straight to maintenance.
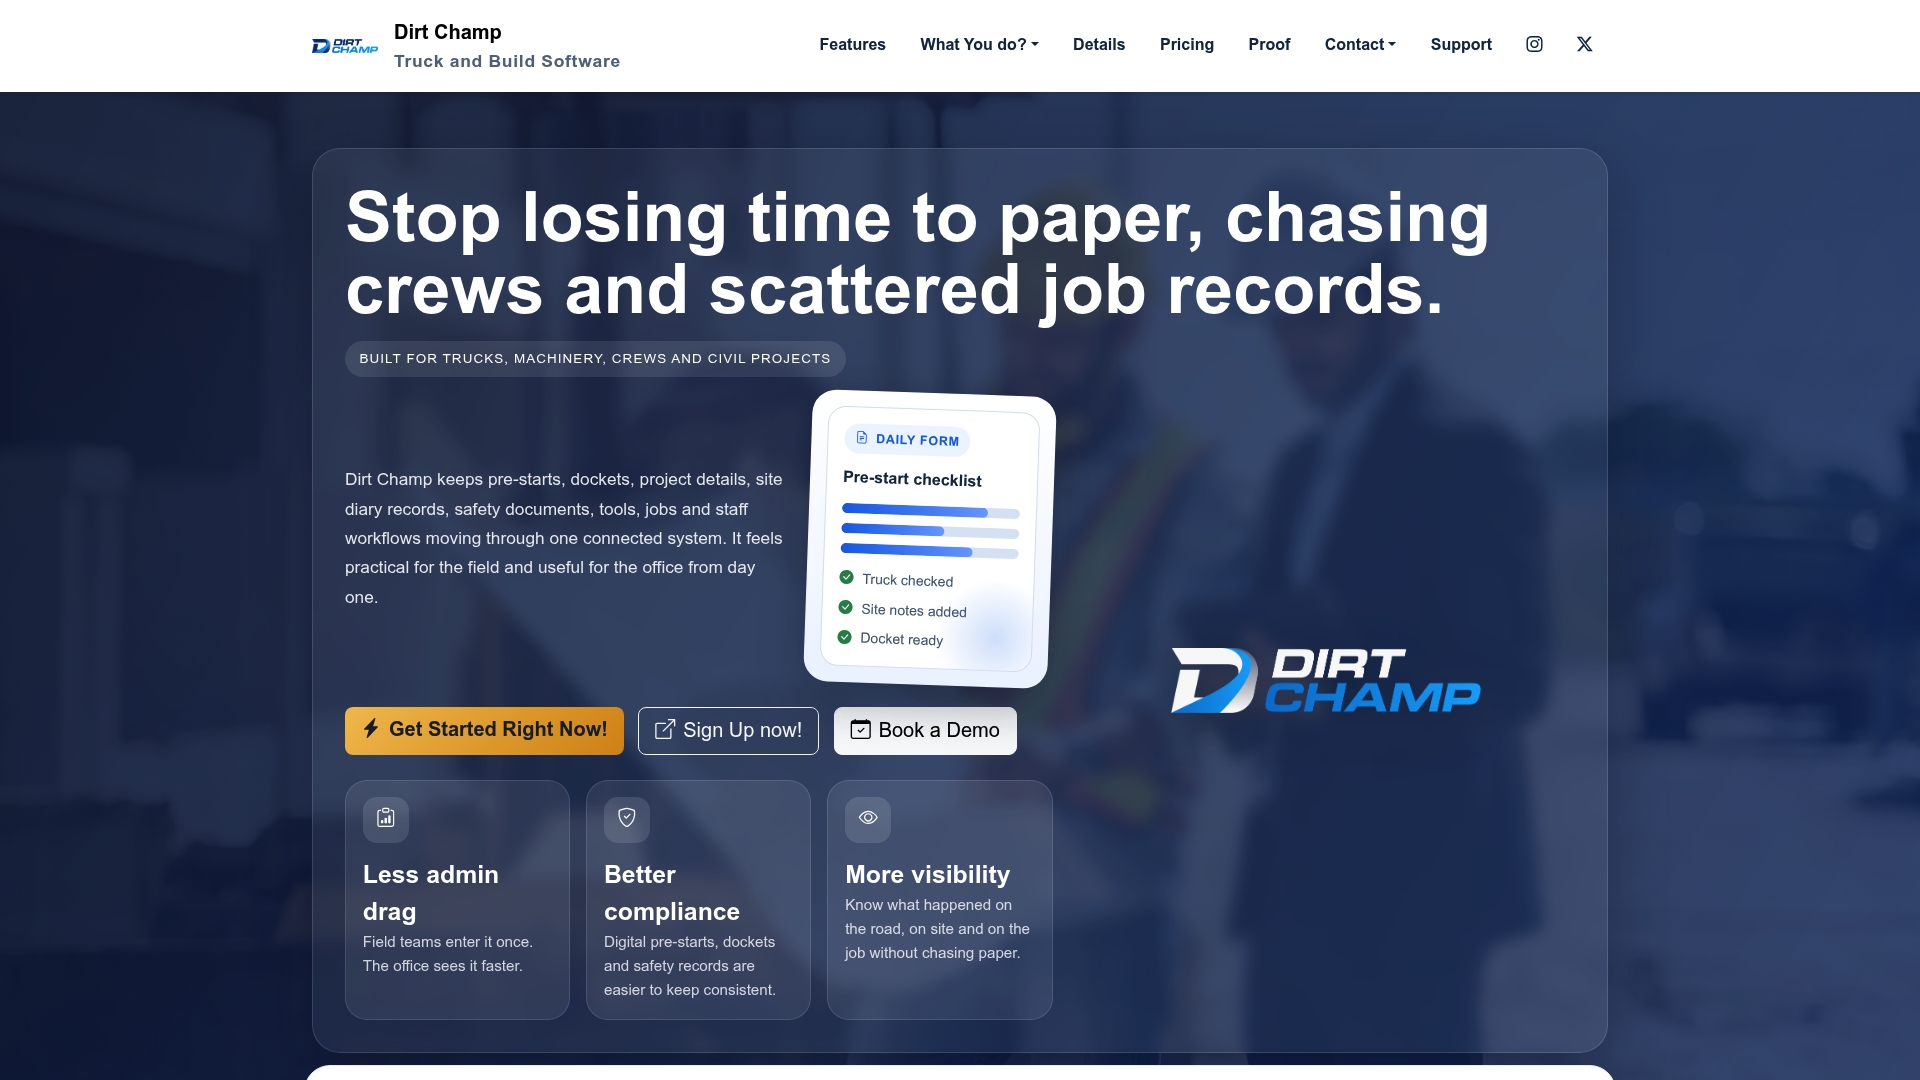
For supervisors, that means faster close-outs and one central log instead of a filing cabinet of paper forms nobody can find when an auditor asks for records. Office staff get real-time visibility into which machines are compliant and which are sitting on an open fault without a phone call. If your site is still running pre-starts on paper or a form-builder PDF, it’s worth seeing what a fully connected version looks like. Visit the Dirt Champ product page to view how digital pre-starts, dockets and compliance records work together, or book a demo to see it running on your own fleet.
Practical checklists and templates to download or follow
For a printable starting point, the free plant and equipment pre-start checklist covers the core system checks. For forklift-specific guidance, see the daily pre-operation inspection checklist, and for deeper reading on inspection routines, the Wells Manager blog is worth a look.